Sorry for the radio silence this week, friends. This tiny mini-post is just an homage to my most popular post about, what else, pancakes. If you need a nice, quick little recipe this long weekend for breakfast, this is it! Pancakes. Pure and simple. Have a fabulous weekend, friends, and I’ll see you next week!
Week of the Garbage Plate: Hot Sauce

This is the very last step in the process, and the reason for the whole week’s worth of posts: the sauce. Without the chili hot sauce, it’s just a mess of ingredients on the plate. With the hot sauce, it’s truly a Rochester Garbage Plate.
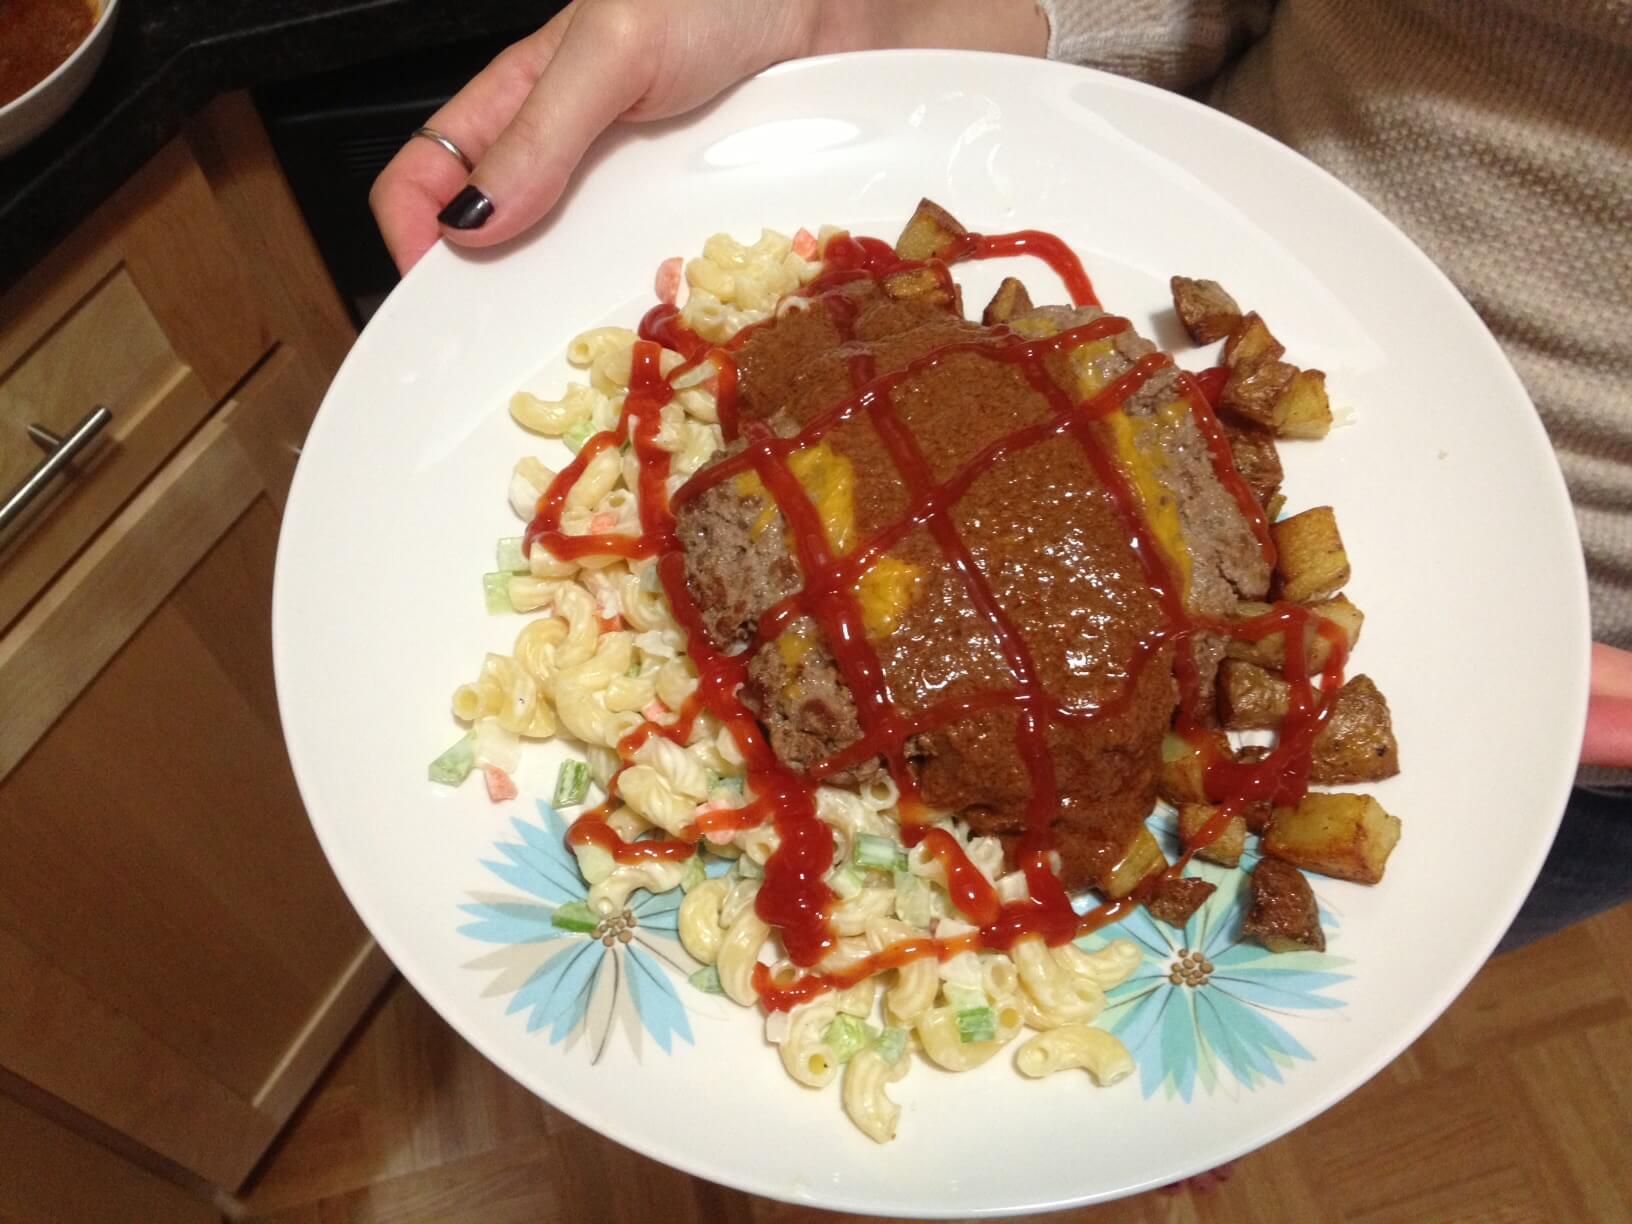
Rochester Plate Sauce, the product that tops my homemade plate in the picture above, is a strikingly close facsimile to the stuff you’ll get in Rochester on a traditional plate. The sauce comes in a packet that can be heated up by placing the pouch in boiling water for two minutes and then pouring over your finished plate (that’s the mac salad, the homefries, then the burger). The Plate Sauce is a little bit on the spicy side, but it makes the plate a PLATE. Die hard plate fans will notice that it lacks the finely ground beef that traditional plates in Rochester feature but again, it’s probably as close as you’ll get if you’re a Rochester ex-pat living in Nebraska or Texas. Well worth the $10 it’ll cost you for 3 pouches.
The last step to the plate is the chopped onions (standard raw white onion, chopped), yellow mustard, and ketchup. And it is extremely important to note that the ketchup design is unique to each person: some prefer the swirly, some go with the smiley face, I prefer the checkerboard. It’s really up to you. And yes… it makes a difference.
Week of the Garbage Plate: Burgers
This is a relatively self-explanatory step in the Garbage Plate process but I thought I’d fill you in anyhow. Garbage Plates can be topped with a variety of stuff: red hots, white hots, hamburgers, cheeseburgers, fried fish, even fried eggs (that’s a breakfast plate if you’re not from the Roch). But my personal favorite, and I would imagine the most popular choice, is cheeseburgers. And don’t go looking for some fancy-schmancy gourmet beef burger with artisan cheese to top it off. This is a good old fashioned ground beef, 1/2 inch thick hamburg with a slice of plain American cheese.
On the menu:
Cheeseburgers
Serves 2 (makes 2 plates)
1/2 pound ground beef
Salt and pepper
2 slices of American cheese*
Mix ground beef in a bowl with salt and pepper. Pack ground beef down into the bottom of the bowl. Eye ball the diameter of the bowl and using the edge of your hand, make a line down the middle of the circle of ground beef. This ensures you have 2 patties of equal size.
Make a round ball with the beef and then flatten it out as thin as possible with your hands, or by pressing down on a cutting board. Grill the burgers on a grill, or in a skillet over medium/high heat on the stove top for 5 minutes on each side. Top the burger with cheese and close the grill cover or put tin foil tent over the skillet for 2 minutes so the cheese melts. Place burgers on top of mac salad and homefries.
*Confession: I had a bag of shredded cheddar that had to be used up so I topped the burgers with that. Don’t worry, still not gourmet. Just not as ghetto/authentic as American cheese.
Week of the Garbage Plate: Crispy Homefries
This is a tried and true method for making crispy homefries, straight from someone who always mucks it up. Either they take forever, or they come out unevenly cooked, or they burn… but these are perfect. Delicious, crispy, soft on the inside, and evenly cooked.
These homefries will sit nicely next to your cold mac salad on the plate, serving as a lovely little bed and ready to hold your burgers. But that’s the next step, and you’ll have to wait til tomorrow for that gem.
On the menu:
Crispy homefries
Serves 4 (or makes enough for 2 plates)
4 large potatoes (Russet or Idaho will work fine), diced into 1/2 inch cubes
3 Tbsp vegetable or canola oil
Salt and pepper
Place diced potatoes between two damp paper towels and microwave them for 2 minutes on high. Heat oil in a large heavy bottomed iron skillet over medium heat. Add potatoes in a single layer and do not touch them for four minutes! This step is so important to get the crispiest crust possible. After cooking for 4 minutes, toss the potatoes and let rest for cooking again for 4 minutes. Continue this process for around 20 – 30 minutes or until the potatoes are crisp and golden on all sides.
Remove potatoes from the skillet and put on a paper towel to drain the excess oil. Toss immediately with salt and pepper. Plate next to mac salad on a large plate.
Note: It should be noted that because these potatoes are the basis of your plate, they’re not overly flavored on purpose. If you’re making these for breakfast, I would add diced onions and finely chopped red and green peppers after the potatoes have cooked for around 15 minutes.
The Week of the Garbage Plate
A few weeks ago I was lucky enough to come in contact with Jim at Rochester Plate Sauce. That’s right, kids. There is a company that packages and sells the glorious (some might say, magical) hot sauce that tops Rochester Garbage Plates. If you’ve never had one, you’re probably thinking, “Whooooo cares? It’s just hot sauce, right?”
WRONG.
This sauce is finely ground beef with about a bajillion spices in it and although I’ve never attempted to make it at home, I can only imagine how labor intensive it is to make. Visions of me, 60 pounds heavier, sweating profusely, with O Sole Mio playing in the background, float around in my head.
Anyhow, Jim sent me a sample of this incredible sauce and finally forced me (FORCED me, I tell you!) to make a garbage plate at home. What else am I gonna do with this sauce?! Well… I’m gonna try a bunch of things. But first things first: the trash plate.
This week I’ll be providing you all the steps you need to take to make these divine plates yourself. And just know that obtaining the sauce is as easy as clicking the link here.
On the menu:
Step 1: Macaroni Salad
Serves 10 (but will make enough mac salad for 5 Garbage Plates)
1 lb elbow macaroni
1 cup mayonnaise
1/4 white vinegar
1/2 cup white sugar
2 1/2 Tbsp yellow mustard
1 1/2 tsp salt
1/2 tsp fresh ground black pepper
1 large white onion, chopped
2 stalks celery, chopped
1/2 green pepper, chopped
1/4 cup carrot, chopped
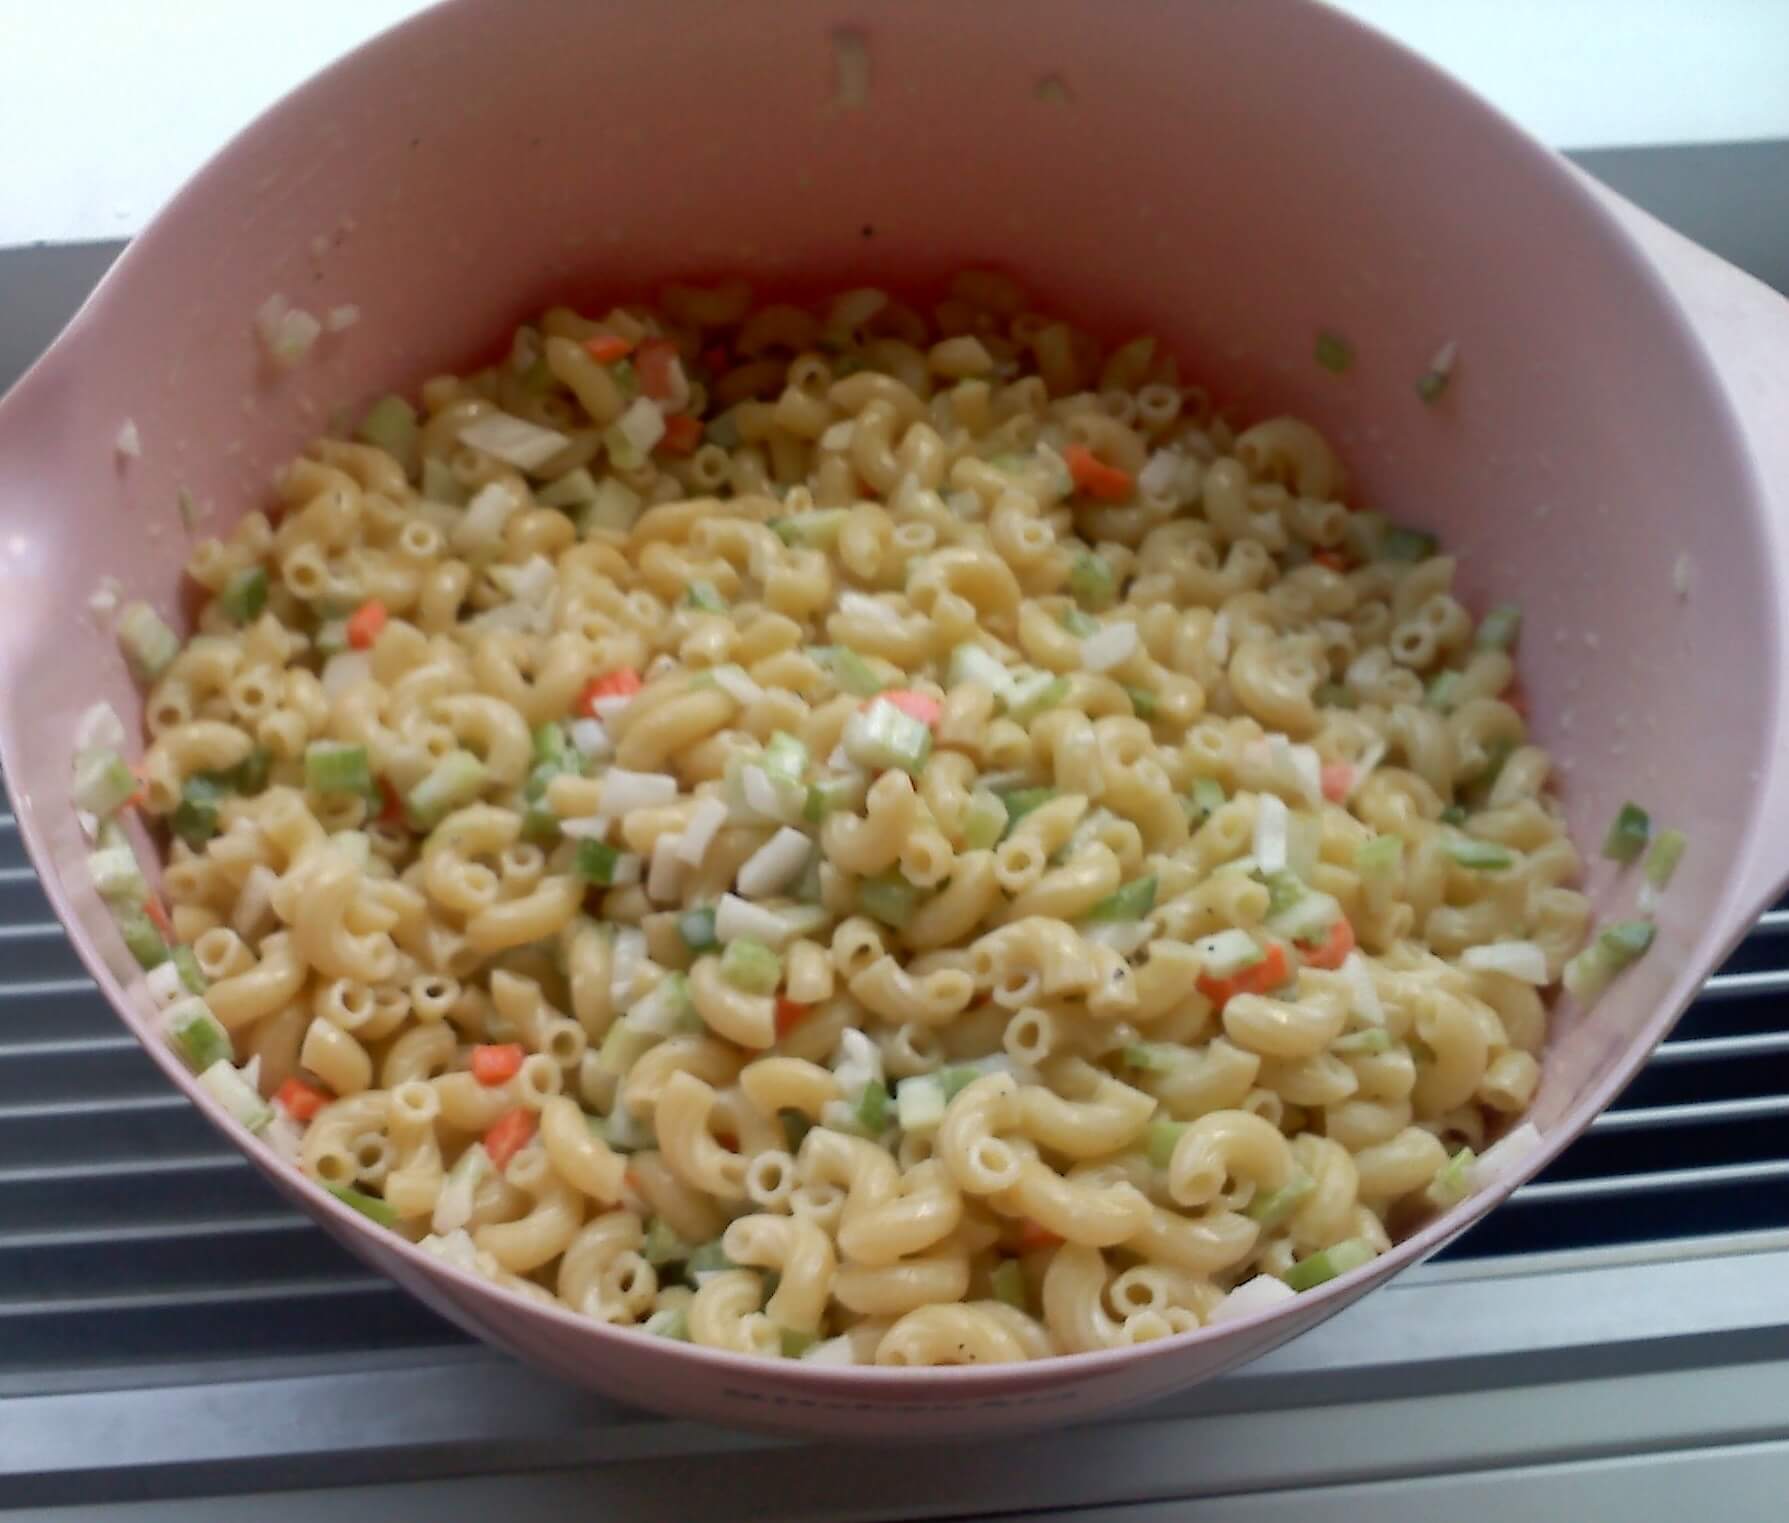
Boil macaroni per instructions. Once it’s cooked, drain and run under cool water to stop the cooking.*
Stir together mayonnaise, vinegar, sugar, mustard, salt and pepper. Stir in vegetables until combined. Once pasta is completely cooled add dressing to macaroni and stir to combine. Chill for at least one hour before serving for best results.
*Note: if you stir together warm pasta with the dressing, the liquid will get absorbed into the macaroni and you’ll have a less creamy mac salad. I know it’s tough, but wait it out and let it cool. It’ll be well worth it, I promise.
A Friday Worth Celebrating
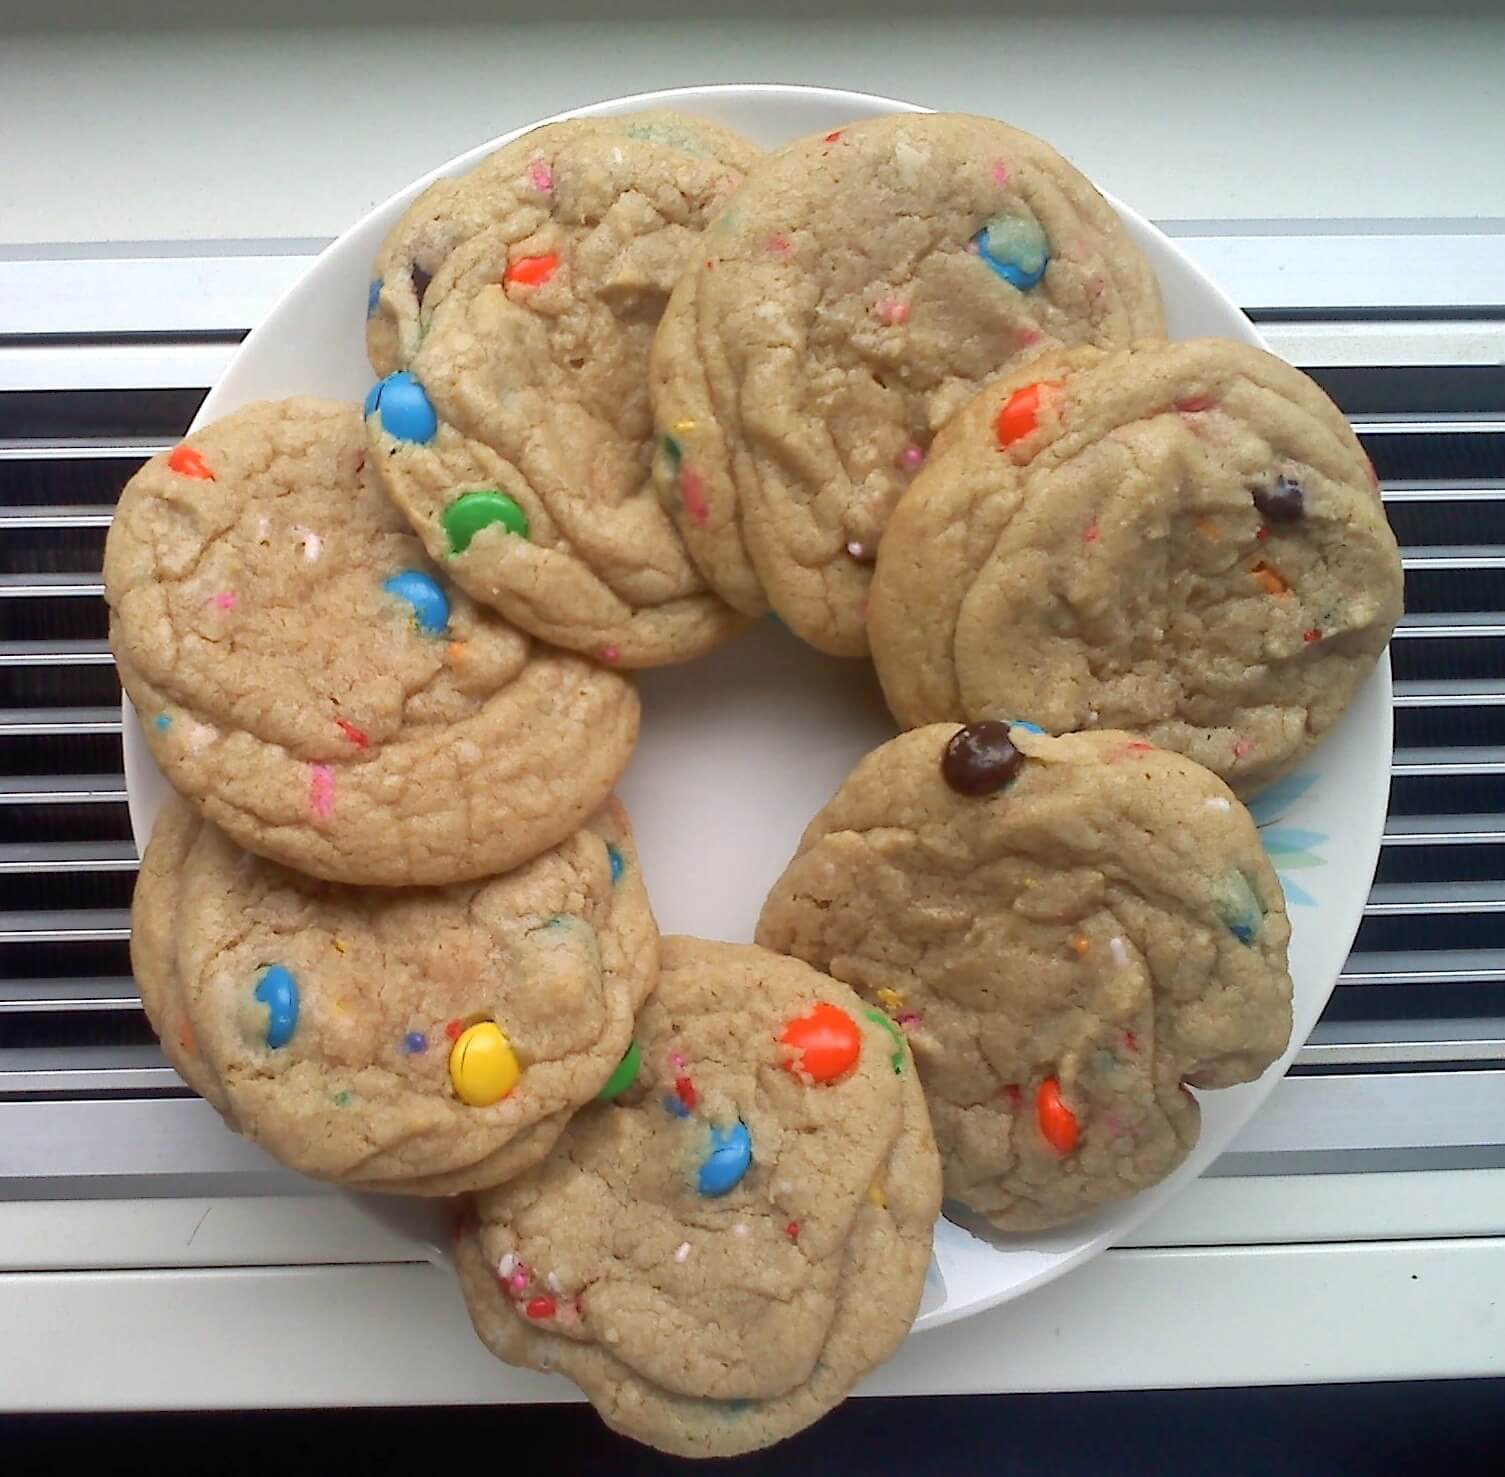
Happy Friday, friends! This week brought an end to the online charity bake sale that I was a part of and I want to give a big shout out to my brother and to Nicole for donating to the cause and snagging themselves some delicious giant rainbow cookies. If you did not place the winning bid but would still like to donate to the charity, click here.
I wanted to share the recipe with you now that the auction is over so that you can make these beauties at home. You can make these in 2 sizes: GIANT (which is what I made for the bake sale) that are like, 4 pounds a piece, or mini which are a more “manageable” size, if you like that kind of thing. Personally I like the giant sized but if you’re making a batch for more than 12 people, I suggest the smaller size.

On the menu:
Giant rainbow cookies
Makes 12 or 36 (see above note)
2 cups plus 2 Tbsp flour
1/2 tsp baking soda
1 1/2 sticks butter, melted and cooled for 10 minutes
1 cup brown sugar
1/2 cup sugar
1 egg plus 1 egg yolk, at room temperature
2 tsp vanilla
1 cup M&Ms (or mini M&Ms, or chocolate chips, or some other delicious small chocolate candy)
2 Tbsp rainbow sprinkles
Preheat oven to 325 degrees.
In a small bowl, whisk together flour and baking soda. Set aside.
In a large bowl, mix together butter and sugars until combined and still liquid*. Stir in the eggs and vanilla. Bit by bit add the dry ingredients to the wet ingredients and stir until combined. Fold in M&Ms and sprinkles.
This step is a TINY bit tricky but don’t let it throw you:
To form the cookies: make a dough ball with your hands (1/4 cup of dough for giant cookies, 2 Tbsp for mini). Break the dough ball into 2 halves. Place one half, broken side down, on the cookie sheet and place the other half, round side down, on top. For a more detailed image see here from How Sweet It Is (also where I got this recipe). It should look like little hour glasses on your cookie sheet.
Bake giant cookies for 16 – 18 minutes, mini cookies for 11 – 13 minutes (careful not to over-bake, these are deeeelicious when they’re a little undercooked). Let cool on a cooling rack completely before eating.
*Note: if you let the butter cool TOO much, you’ll get a weird solid dough after you mix the butter with the sugars and it’ll be impossible to mix. You don’t want the butter so hot that it’ll cook the eggs, but you don’t want it chilly, either.
Molasses Crinkle Cookies

Well, it finally happened. I didn’t see it coming, but I can’t say I’m surprised. The BF told me he’s tired of chocolate chip cookies. While some women might be offended, I was relieved. We were contemplating buying stock in butter, I was making so many chocolate chip cookies. But just because we put a moratorium on America’s Favorite doesn’t mean we’re done with sweets all together. Oh no, friends. There must be sweets at all times in the Miller/Accardo household.
So this week I bring you something new and different! Something from the Applehood and Motherpie Cookbook, a staple in my home growing up. These cookies are my favorite type: soft and chewy. Amen.
On the menu:
Molasses crinkle cookies
Makes 5 dozen cookies
3/4 cup butter, softened to room temperature
1 cup brown sugar
1 egg
1/2 cup molasses
2 1/4 cups flour
2 tsp baking soda
1/2 tsp salt
1/2 tsp ground cloves
1 tsp cinnamon
1 tsp ginger
1/2 cup granulated sugar
Preheat oven to 375 degrees.
Cream together butter and brown sugar with an electric mixer. Add egg and molasses* and beat well. Add flour, baking soda, salt, cloves, cinnamon, and ginger and stir together with a big spoon. Shape dough into 1-inch balls with your hands. Put granulated sugar in a shallow dish and roll dough balls until coated in sugar.
Place dough balls 2 inches apart on a baking sheet. Bake for 10 – 11 minutes or until the edges are slightly darker brown. Let cool on the baking sheet for at least 10 minutes before removing and cooling on a cooling rack.
*A neat tip on measuring molasses is to spray cooking spray in the measuring cup before you pour the molasses in to measure. When you pour it in the bowl, it’ll slide right out of the cup.

