Tag Archives: Tips

Tips for Throwing a Holiday Brunch (plus sweet fruit dip!)

Brunch Today’s post is the last in the holiday brunch series, and I thought I’d offer up just a few more tips on making your brunch a success.

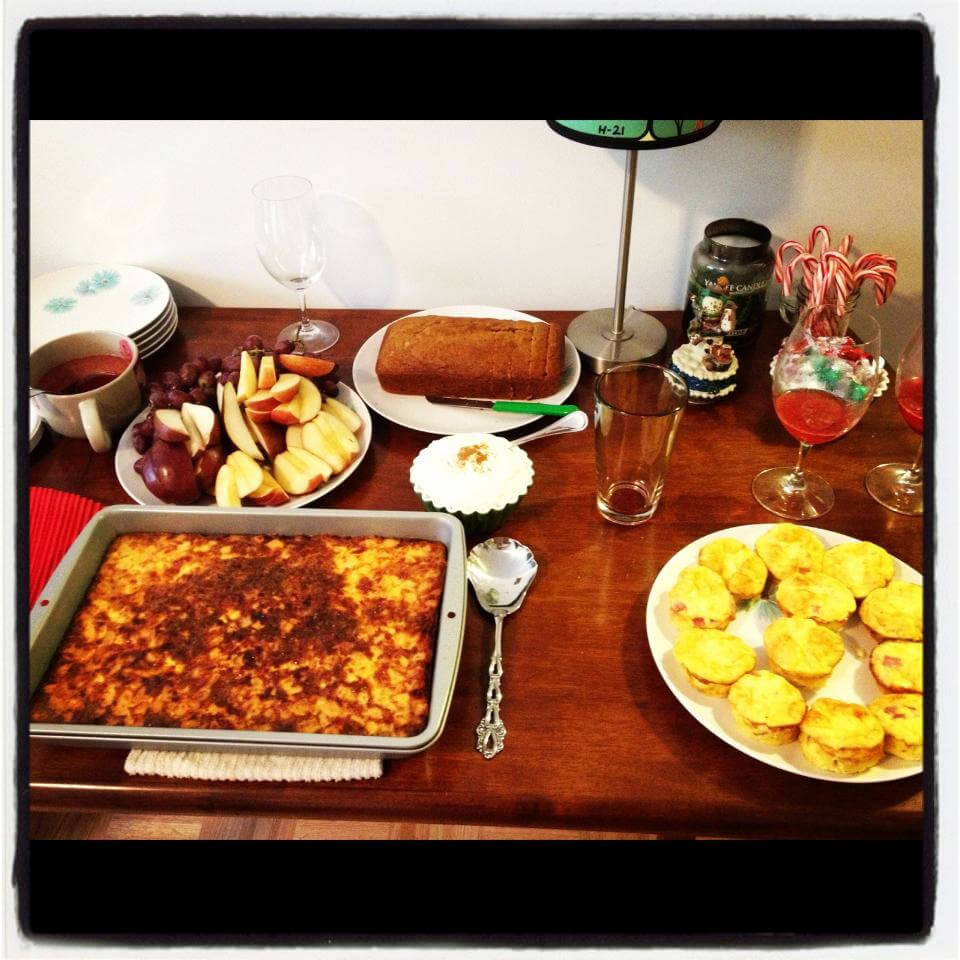
1. Finger foods: Never have I ever seen a holiday home brunch where every single person sat down at a nice, long table complete with place settings and a solid surface to cut their food on. Where’s the fun in that? Keep your food small and finger-friendly, and if you must use utensils, limit it to forks. That way everyone can still eat even if they’re standing, and everyone has a free hand for a cocktail. Duh.

2. Keep it small: No one shows up to a holiday brunch ready to eat their faces off. Okay, MOST people don’t. During the holidays, everyone is up to their ears in cookies from co-workers, sweets at home, and candy cane colored everything. The last thing people want is to be force fed your giant culinary mess. I also like to keep things small so that it’s never apparent how much any one person has eaten. Maybe somebody wants only one slice of apple. Maybe somebody else wants eight pounds of hasbrown casserole. No judgment.

3. Balance the sweet and the savory: One year I attended an office potluck holiday party where someone brought chicken wings… they disappeared in about 3 minutes and at the end of the night there were more cookies and cakes leftover than you could shake a stick at (that’s how that saying goes… right?). The moral of the story is that one cannot live on sweets alone… trust me. I’ve tried. Make sure for every sweet dish, you have a savory.

4. Loosen up: No one cares if your plates match or your house is spotlessly clean. They care that they’re all together under one roof, oftentimes for the only time that year. Forgive the spills, laugh off the food flops, have another cocktail, and remember: brunch is an early meal so you can be asleep by 8. Amen.

The last dish on the brunch menu is one I am a tiny bit embarrassed about… it contains Fluff. That’s right. That disgusting, sticky, white spread that my mom wouldn’t let me have when I was a kid but I would sneak at friends’ houses (sorry, mom). It’s gross. But you know what? It makes a damn fine dip for fruit. And when I started researching “fruit dip” this one came up more than I care to mention. So should you dare to add one of those vintage-labeled jars to your cart at the supermarket, you won’t be disappointed. Cross my heart.

On the menu:
Sweet Fruit Dip
Makes 2 cups

1 7-oz jar of Fluff
1 8-oz package of cream cheese, softened
1/4 tsp ground cinnamon, optional

Add Fluff and cream cheese to a large bowl. Using an electric mixer, blend the mixture together. Pour into a bowl and top with a sprinkle of cinnamon for decoration if you wish. Cut up fruit to serve alongside, such as pears, apples, and grapes.

Leave a comment

Filed under Recipes, Tips

Cake Decorating 101


This past weekend was my oldest and dearest friend’s bachelorette party and I wanted to make a special cake in honor of her last single girl hurrah. You can imagine what I found when I Google’d “bachelorette cakes.” Let’s just say unless you have Google Safe Search on, don’t check it at work.

I opted to go for simple and classy using one of the bride’s wedding colors, purple. Below is a step-by-step process for writing on a cake without it looking like you let your three year old child do it. Not that I’m speaking from experience just… well, just in case YOU have that problem. For all interested parties: the cake is chocolate with vanilla frosting.

Step 1: Get the right tools
I bought a $5 cake decorating kit from Bed, Bath and Beyond that includes a bunch of disposable pastry bags and 3 different tips. If I was making cakes for a living then I’d invest in something more serious but so far, this has done the job for me. I use the smallest, round holed tip for text.

Step 2: Prepare your text
I used the empty cake pan to trace a correctly-sized circle on notebook paper, typed out my message in bold text in Word on my computer, then traced those letters on my cake-pan-sized outlined notebook paper. Next, I used cuticle scissors (properly cleaned beforehand, of course) to cut out the letters, leaving me with a stencil of my message that I already know will fit on my cake (which is half the battle if you’ve ever tried to do this freehand).

Step 3: Creating the message on the cake
Once your cake is frosted and chilled (so that the frosting is firm), lay your stencil over the top of the cake and using the end of a chopstick, poke light impressions where all the letters should be. When you lift your stencil, you should be able to see the light impression of your text.

Step 4: Writing out the message on the cake
Fill your pastry bag with frosting (Tip: fold the top of the pastry bag over your hand for a more firm grip). Follow the impression you made on the top of the cake, making sure to apply enough pressure so that your frosting sticks. End each letter with a firm press, like a period at the end of each letter, so that each letter has a clean end and doesn’t trail off like it would if you dragged your pastry tip away.

The result is a message that looks almost professional (if you mess up, don’t worry, you can always either scrape it off or fix the letters with a toothpick) and way better than your typical childish chicken scratch.

Is this something you’d like to see in a video? Let me know! If I get a response, I’ll spend some time this week creating a step-by-step instruction on cake decorating.

Leave a comment

Filed under Tips

Tips for Making Fluffy Cakes

Hello friends! Don’t miss my post over at Yumm.com today on tips for making fluffy cakes. One time I baked a cake that turned out like a brick. It was embarrassing. Don’t let that happen to you.

1 Comment

Filed under Miscellaneous